
How about we finally wrap up these kitchen rehab posts?! Finally. I know! If you need to catch up, you can read all about how I painted my cabinets without sanding them here and see the finished kitchen here. Painting the cabinets made a huge difference and lightened up our kitchen so much! But I knew from the beginning that the backsplash needed a fresh look too.
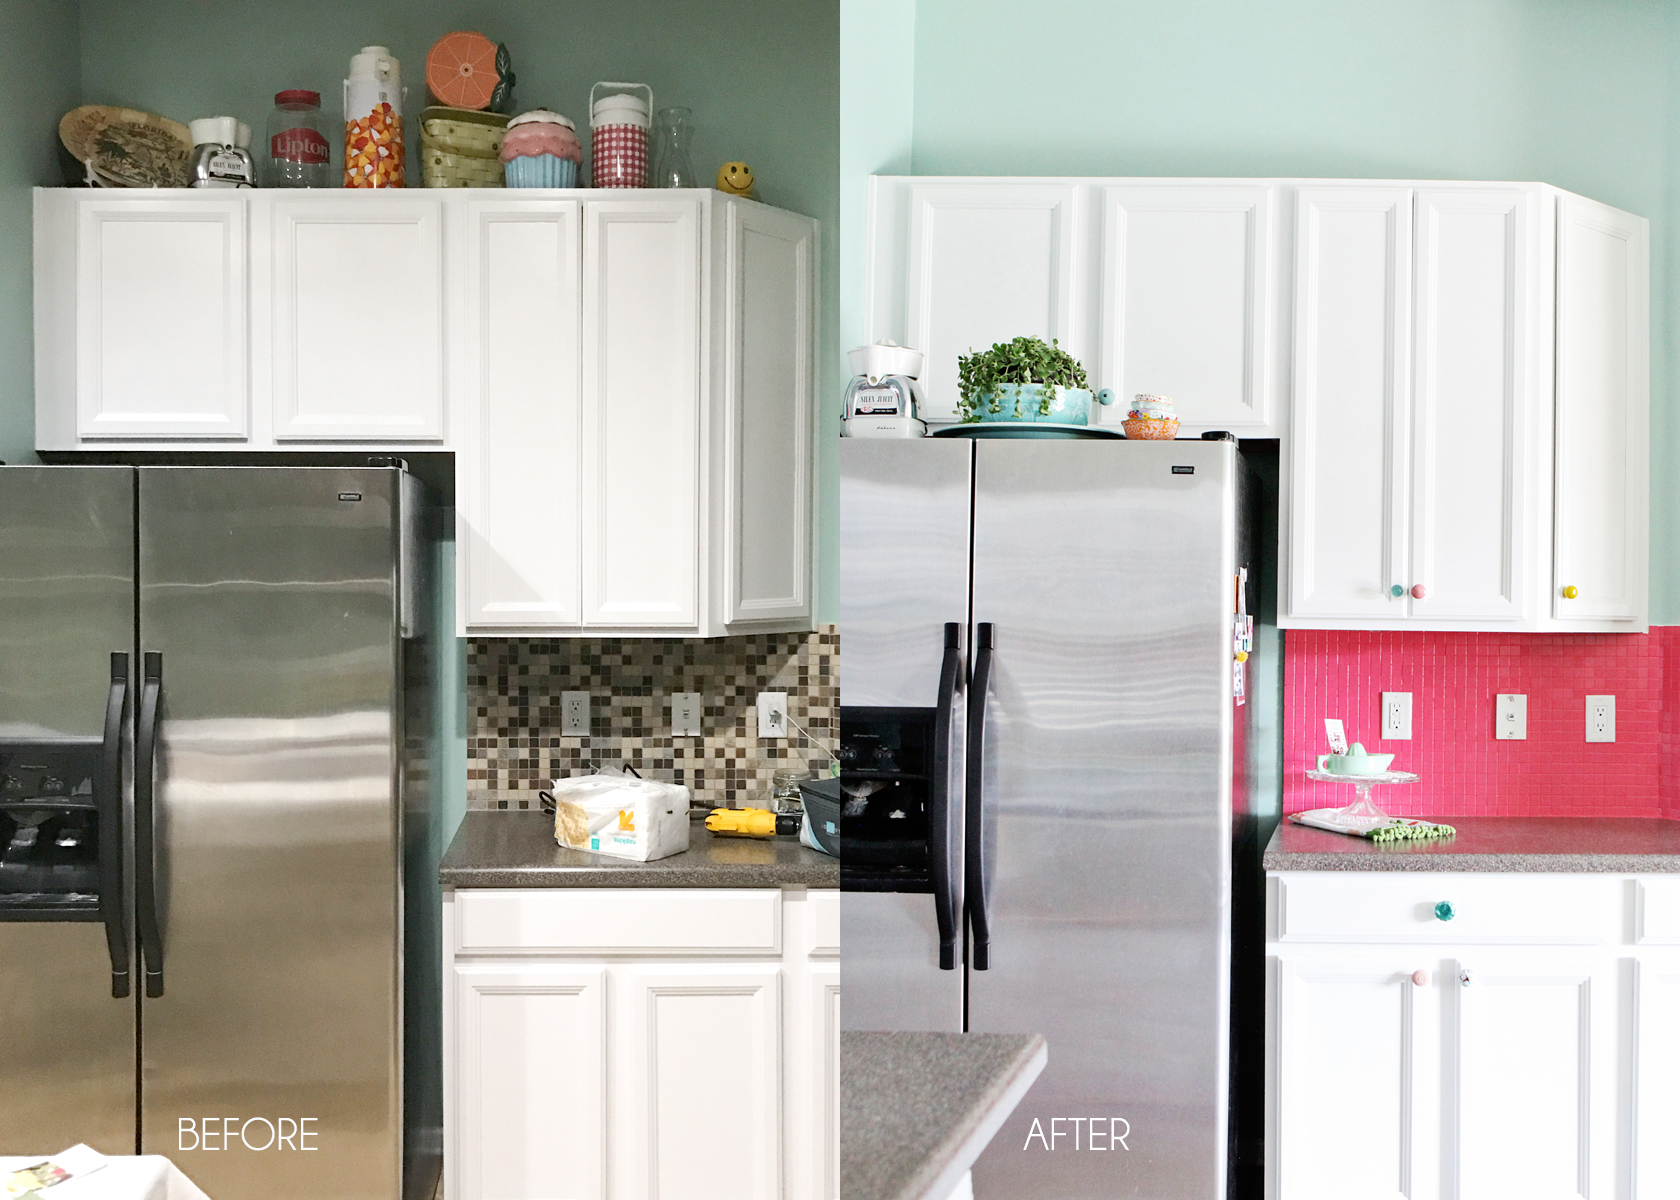
Here’s a before and after. The backsplash just didn’t “pop” against the cabinets. 😉 I thought about putting in a white subway tile, but then it started to feel like every Pinterest kitchen I’ve seen over the last 5 years! I do love the white-on-white look, but it didn’t feel right for our house. That’s when the brilliant idea hit me (HA!) – I could paint it any color I wanted. And if it was a disaster, then I could look at putting in something else. I mean, why not?! Living on the edge, people. That’s what this is. You can check over here to get the right kind of paint that you require.
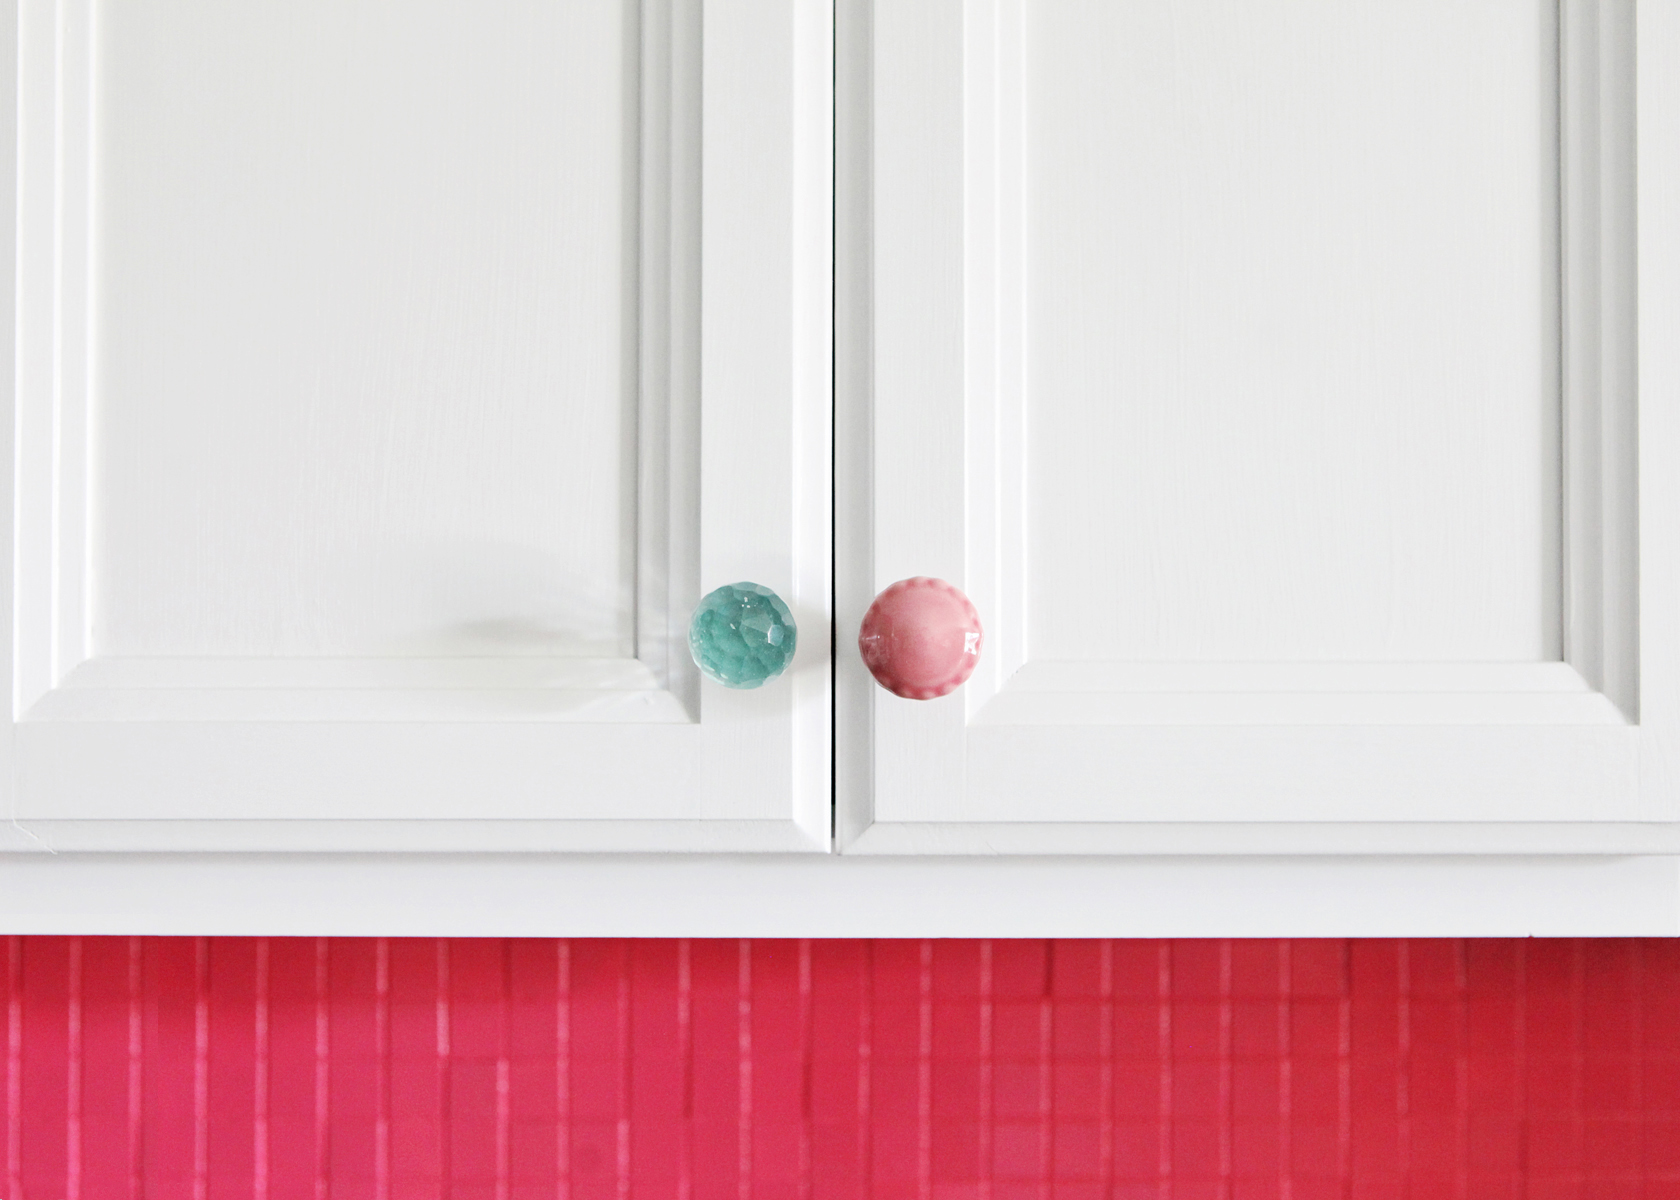
It definitely “POPS” now. Don’tcha think?!

It’s very pink! Did I mention that I thought I hated pink now? I don’t even know myself anymore.

Supplies:
– TSP All Purpose Heavy Duty Cleaner
– Zinsser Bulls Eye Primer
– Valspar Anti-Rust Armor Gloss Oil Based Enamel Paint
– Jasco Mineral Spirits
– All Purpose Flat Paint Brush
– Painter’s Tape
The drawer knob template was for adding the knobs to all the drawers and doors. For the record, that little gadget made the job SO easy!

Here are the super easy steps I used to paint my backsplash:
- Opened the windows and put on a mask, because everything I used was stinky.
- Cleaned the tile with TSP. This stuff is no joke! I just mixed a small batch and used the rough side of a sponge to get all the dust, grease, and who knows what else off the tile. It’s important to paint on clean tile! Then I let it dry for the rest of the day.
- Taped every edge with painter’s tape. I’m a messy painter, but even if you’re slow and precise, this stuff makes any job easier.
- Then I painted a coat of primer and let it dry overnight. This stuff was awesome! It covered the tile in one coat.
- Last step was painting on the color. A couple of thoughts on this – I don’t like using oil based paints, because they smell bad and are harder to work with (in my opinion), but I knew it was the best product for this project! So I had the paint tinted at Lowe’s while trying to explain to the paint guy that I was painting my backsplash pink. He kept saying, “This is definitely the best paint for that… but you’re sure? PINK?!” I chose gloss, because I wanted the paint to have a high-shine/wet look. I thought I’d need two coats of color, but after doing one I was totally happy with the coverage. So that was it! I let it dry overnight then went back with a tiny brush and filled in a few spots I had missed in the grout. It was tricky getting the paint on thick enough without having drips, and I couldn’t go back over areas after a few minutes, because they were already starting to dry a little. You have to work fast!
The paint was a little sticky for several days and at some point during that time Kingston got curious and scraped at the paint with his fingernail. It came off a little, and I was worried that this wasn’t the best plan ever after all. But I’m happy to report that I tried the fingernail scrape myself yesterday (had to make sure I covered every angle for this post!) and I couldn’t get any paint to come off. It’s on there good, and I think it just needed to completely cure to bond to the tile correctly.

I’m so happy with how the backsplash turned out and really feel like it was a small step that gave the entire kitchen the look I had in mind. If you’re looking for an easy, inexpensive way to update your kitchen, give this a try before ripping out your backsplash! It’s just paint!
Save